| |
6/20/2014 - Front Carport Bay
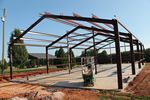
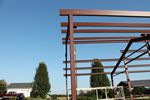
We got an early start this morning, and good thing we did. We set the columns in less than an hour. While Leroy and Audifaz installed the eave struts, Nip and I used the LULL to move the roof beams into place. We got those bolted together and hoisted them into place. We were really moving along well.
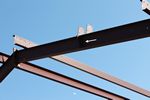
We started installing the purlins on the roof and were having a little trouble lining up holes. We had one side almost all done when I brought down the next piece to bolt up. There are two vertical girts that hang from the roof beam and support the horizontal girts at the front of the overhang. After looking at them for a while I realized that the tabs they hang from on the roof beams were on the wrong side. We stopped working and went back to the plans, no help there. After dry fitting a few more parts I convinced Brandon we had to swap the roof beams around. He finally relented. This involved removing all of the purlins we had already bolted in place, supporting the roof beam from the LULL, unbolting both ends from the columns and swinging the beam 180 degrees. That was about 4 hours of work down the toilet. Oh well, it's all better now.
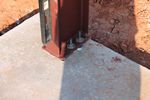
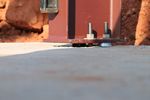
Before we started putting the purlins back up Leroy mentioned that he thought if we lifted the front end of the purlin they would have less trouble aligning the holes at the garage door frame. We tried lifting the end about a half inch and everything lined up fine for them. We double checked the level of the eave struts. One side was dead nuts, the other was low at the front by a half inch. We loosened the anchor bolts on that column, hooked up the LULL and picked the column up until the eave was level. Washers were used to hold the column up until we can get some grout in there for a permanent fix.
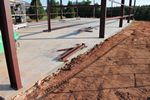
Seems that when we were pouring one of the concrete guys was standing on the forms at that corner. That's another black mark for the concrete guys.
I asked the guys to come in on Saturday so we can finish with the front bay. On Tuesday we'll go through and double check everything for true, plumb and tightness. Then the insulation and walls start going up. WOO HOO!
|
|
|
|
|
Copyright (C) 2004-2014, Larry Manka. all rights reserved.
|
|