| |
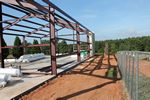
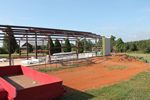
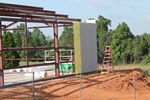
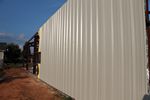
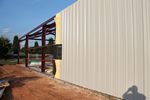
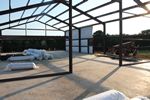
6/25/2014 - Walls are finally going up.
We started early again today. Leroy brought his nephew so we'd have an extra pair of hands. He was okay, but not used to working hard.
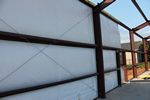
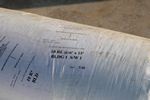
We started by sorting through all of the rolls of insulation. The sheets are pre-cut and go in specific places. We got an unpleasant surprize when we unrolled the first bundle to find out the insulation was only faced on one side. This meant that we'd be handling raw fiberglass all day. Gloves helped but as hot as it was long sleeves were a part time thing. Each sheet of insulation was 6 feet wide and 15 feet long. That meant that we had to roll out a second sheet before putting the 3rd panel so we could tape the seams. Of course it was windy today so keeping everything in place was a pain in the rear.
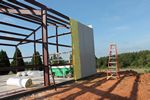
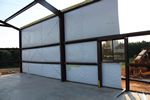
After we had four or five panels up we realized that I had been overlapping the panel the wrong way. I was putting the side with the lip over the next panel, which required us to lift the edge of the panel that was already in place. The edge with the lip is supposed to go underneath the next panel which allowed us to just lay one over the other. Sometimes I can be a real idiot. While we were checking the plans to confirm my mistake, we also realized that the plans showed that the second panel overlaps the first by a foot rather than on edge. This actually made re-lapping the panels easier because we could take a panel off and move it over without interference. Things went well after that until we got to 'THE WINDOW'.
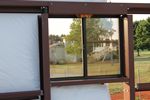
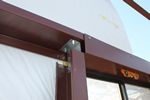
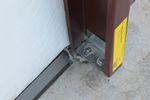
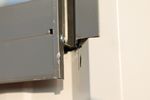
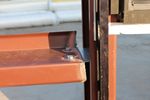
We had pre-assembled the window frame parts yesterday without knowing exactly how they would fit in. The windows are 'field located' so there were no pre-cut parts in the building for the frames. I decided (assumed) that the window would be centered between the columns so we did some measuring, checked it twice this time, and started hacking away on the lower girt with the torch. Now that the girt was cut we had to locate holes so that the new short girts could bolt to the brackets on the window frame. We got the frame into place but had to move it out of the way to cut spaces in the bottom drip cap so we could plumb the window frame columns. Of course one base clip in the column was right where one the anchors was in the floor. A little more torch work and some hammering solved that issue.
The detail drawings on the plans that show how to install the windows assume you've done this before and were confusing as all get out. We put the window in, took it out, moved some trim around, scratched our heads, double checked the plans, put the window back in, took it back out, broke for lunch, changed the top clips on the columns, bolted the frame in place, and finally, after leaving Leroy alone with the drawings for a while, figured out what to do. Thanks Leroy, you are getting a raise. After 2 or more hours of screwing around, we finally had a feasable plan.
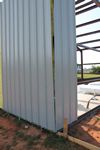
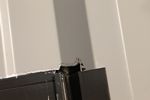
We placed a few pop rivets in the flanges to hold the window plumb and square. The drill bit we had was just a hair too large and it was tough to reach the bottom flange. If we didn't get the holes straight,which was impossible, the rivet just pulled right through the holes. A clamp and a couple of nails held the window until we got the sheet in place.
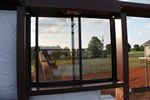
We tossed a sheet up and marked the top and bottom of the window, measured the depth twice and took the sheet up to the garage where we could cut the notch out of the panel with the plasma cutter. The plasma cutter leaves a much cleaner edge and doesn't warp the sheet metal as much as the torch would. That plasma cutter is the best investment in tools that I've made in a long time, and I've had it for 4 years now with little use.
Tomorrow we cut the next panel to finish up this window, and now that we are experienced we should be able to move right along until we hit the next window. Every day is a learning experience!
|
|
|
|
|
|
|
|
|
Copyright (C) 2004-2014, Larry Manka. all rights reserved.
|
|