| |
7/2/2014 - Door frame and carport sides.
No rain in the forecast for today, but it's gonna get HOT!
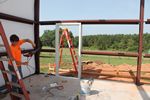
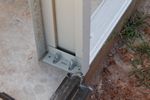
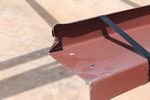
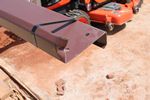
We started today by continuing the installation of the rear man door that we aborted due to rain on Monday. We had picked a location on Monday but I was worried that we might have too small of a strip alongside the door frame when we started cutting the panels. We brought a couple of the short panels down and laid them up to give us an idea of where the panels would fall on the door. Brandon recommended we move the door a few inches away from the corner to get a little wider strip on the second panel. We had to remove a little more of the bottom drip rail to accommodate the move. We measured the length of the corner girt several times and I went up to use the plasma cutter to get a clean line. The torch is faster but leaves more slag and is harder to get a nice square line. Because the door frame screws into the girt I wanted to get as much girt into the door frame as possible.
We marked the anchor holes for the Red Heads on the lock side of the frame. Leroy drilled the holes with the hammer drill and we set the anchors. The top of the frame attaches with small pan head screws to the girt on one side and an attached l bracket on the other. We made sure the lock set side was plumb and square and screwed everything in place. We marked the hinge side for anchors after plumbing it up and Leroy went to work with the hammer drill again. Of course we hit re-bar in the first hole. We drilled and set the anchor in the second hole, got everything lined up and used a hammer in anchor in a small hole in the bottom bracket. I measured and cut the girt for the other side and we got that installed without any drama.
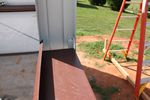
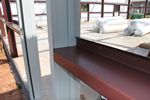
The aluminum door threshold required we take ¼” off each end and notch it for the door jamb. I took the piece up to the garage and used my chop saw to cut everything. Brandon used a hacksaw to cut the small area I couldn’t get to with the chop saw. He was surprised at how well I did the cuts with a tool not designed for that kind of job. We only had to tweak one little tab with the hacksaw to get a perfect fit in the door frame. Foam tape and caulk went down, then the threshold and we used ¼” hammer in anchors to hold it in place. All in all everything went well.
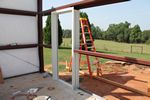
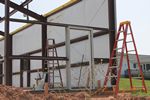
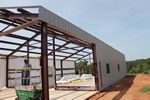
Next job was to finish installing the sheeting on the sides. We needed to cut a large notch out of 1 full panel for each side and then it was just screwing the 2 foot panels up top for the carport overhang. We trimmed back the insulation and removed the glass where the columns were. Leroy and Audifaz finished one side and it was time for lunch. Man is it hot out, we’ve already gone through almost a full case of water.
Brandon split to check on some other stuff he’s got going. After our lunch break I decided it was really too hot but that we could finish the second side of the carport before anyone died. The second side went up pretty quick and with Alston picking up while Leroy and Audifaz worked we were done in no time.
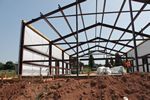
From now on until we start on the roof, every panel will need to be cut for the roof angle. Maybe we can get the front of the carport done tomorrow so it looks like a garage from the street.
|
|
|
|
|
|
|
Copyright (C) 2004-2014, Larry Manka. all rights reserved.
|
|