| |
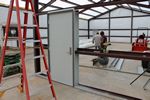
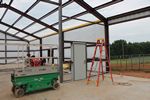
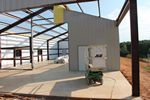
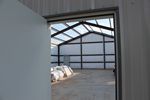
7-9-2014 - Install front door and half a wall.
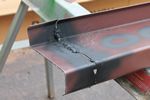
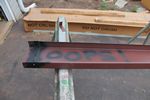
We got a slow start today because Alston decided that because it was raining at his house he'd let Leroy sleep past his alarm. Audifaz was on time so had a light morning until the others showed up. While we were waiting for our sleepy heads, I dug out the Harbor Freight MIG welder to try and fix the girt that I cut too short. The cuts were kind of wavy with some serious gaps, but close enough to put together. I haven't used the MIG in a while so I was pretty rusty. The welds weren't pretty, but I did manage to glob enough filler on the joint to get the parts to stick together. After I ground away the surfaces that we would be screwing to, Brandon made me paint the ugly parts so he couldn't see them. Everything will be behind the walls but I had to hide the bad welding job.
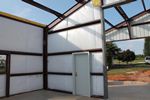
I had to trim another 1/4 inch off the repaired girt, I guess I could have used that to clean up the edges for welding. I had Leroy check the back door as to which surface was out so we flipped the door over. We went to attach the hinges and there wasn't any clearance at the bottom. After flipping the door again it fit fine. We even got all of the hinges right side up this time. Now that I'm thinking about it the two doors swing in opposite directions so the door would naturally be reversed. The lock set went in smoother this time but we're still waiting for a missing striker plate.
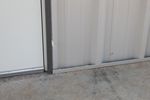
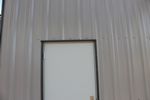
Sheeting will be a little different on the wall because there is base trim that captures the sheets. We'll have to set the sheet in the bottom trim then slide it over to meet the roof angle. That was a hassle around the door because the panels also had to slip behind the door trim, inside the bottom trim and lap the next panel all at the same time. We got it done but I'm sure glad there is protective plastic over all the trim pieces.
I had called Premier to ask how to install some trim pieces we couldn't figure out. The guy with the answers was of course busy all day and wouldn't be able to call back until the end of the day. My call to them was before we had started sheeting the front wall. When he eventually called back at 4:30, he explained how the trim pieces worked, which, as has been par for the course on this project, required that the sheeting we had already cut and installed wasn't per the plan details. We had looked over the plan details and none of it made any sense until he explained what to do.
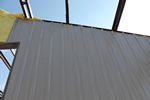
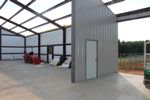
Brandon suggested that we take down what we had just spent 4 hours installing and order 5 more panels so we could do it the way the plans showed. I convinced him that we actually had a better system and that we would work out a plan for the 8 inch gap above our panels to the roof line. I'll get some thick foam and we'll cut those to fit the gap between the top of the wall and the roof insulation. WAY, WAY easier and probably more efficient than trying to do it their way. He's gonna lay awake tonight fretting over how to fill that gap, but I've got a plan and it'll work fine. I may not be the world's greatest flux core welder, but I'm a great problem solver.
We're gonna be short handed tomorrow so we'll take our time, measure twice and hopefully get most or all of the front wall done. There shouldn't be any complicated cuts so it should go reasonably smooth.
|
|
|
|
|
|
|
Copyright (C) 2004-2014, Larry Manka. all rights reserved.
|
|