| |
7/23/2014 - Factory Reps try to resolve the issues.
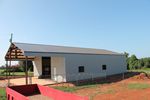
Leroy and I started the day by laying out the lines for the bathroom walls. I decided to use 2x6 lumber for the walls so that I could double up on insulation and also have plenty of room for plumbing. The bathroom measures 10 x 12 ft on the inside.
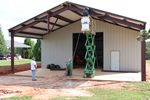
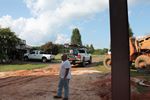
The factory is sending a couple of guys with new roof rafters today. They arrived about a half hour late and as soon as they got out of the truck they were on the phone. These were both younger guys, neither of whom had ever assembled a building before. Daniel, the guy in charge, works in the cutting shop with the CAD plasma cutter and Randy, the helper, supervises in the paint shop. They saw that we had installed the roof and didn't have a clue as to how to proceed. I told them that we would help them build t-braces to support the roof if we needed to replace the rafter.
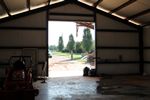
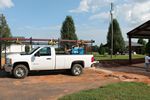
They had sent Daniel with the same drawings and dimensions that everyone else had when they came. We measured the building six ways from Sunday and Daniel still couldn't figure out why the dimensions were different from the plans. He dug out his transit and started shooting elevations. He shot from the garage door to compare the feet of the front columns with the feet of the row 3 columns. By this time Brandon had arrived from a shuttle trip to the airport. Daniel called out a number and Brandon stepped up to the transit for a look. I guess Daniel was using the wrong line in the transit because Brandon had a different elevation. They were well within tolerance. The guys from the factory were overwhelmed. I think Daniel spent as much time on the phone with his office as he did working. Every time he called he would walk off so we couldn't listen in on his conversations.
Daniel wanted to go ahead and swap the rafters with the set he had brought with him so he could go home. I told him to do himself a favor and measure his rafters and compare them to what was in place. He did so reluctantly but they were identical to what we had in place so changing them would have been a waste of time. He was really frustrated at this point. I told him that if we could get the bottom girt line at 12 feet like it’s supposed to be and straight across I could live with the slight rise in the roof. After more measuring and fitting we determined that the bracket on one side that holds the stub column was not vertical and would have to be relocated. I had the equipment on hand to do the cutting but he would have to rent a welder to put it back. It was about 3 O'clock by now so he and Randy set out in search of a portable stick welder. We gave them a list of places to check locally for steel and rentals and off they went.
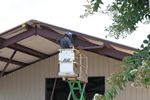
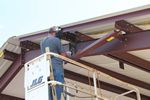
I sent my workers home and took advantage of the down time to mow the front yard, it was getting pretty raggedy. At around 4:45 the factory boys returned with a Miller Bobcat stick welder on the back of the truck and set to cutting the offending bracket loose. Once cut, a few serious whacks with a sledge brought it into alignment and Daniel got busy with the welder. After about an hour of welding and 13 welding sticks later, I told Daniel that it was going be dark soon and it was probably going to hold we'd better move forward.
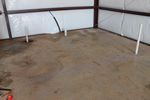
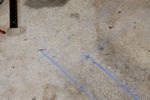
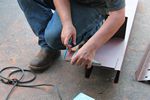
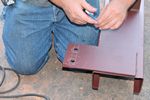
They re-hung the stub column and we got measurements for extending the holes in the bracket so it would hang low enough, about a half inch. They took it back off and I had Daniel mark out lines so I could plasma cut the holes. With the stub column back up, they set the lower girt in place. It came out level, finally something was going right. They moved to the other stub column and we measured again, we needed and inch on this one. Daniel was afraid to take a whole inch out of the column tab so we marked and cut a half inch like the other one. He was still high so he decided to burn the holes in the rafter bracket. Once back in place they set the lower girt on that side and it cam in level a well. WHEW! The center girt was installed and the bottom line looked good.
It was now about 7 or 7:30pm and they moved on to the top girt line. Because we had lowered both stub columns we also had to lower the outer girt clips to match the clips welded to the columns. Those clips are bolted to the rafter so Daniel just used the torch to lower the holes on one side. Left side looks good, now to the right. That clip was already off and we had lengthened the holes on the clip with the plasma cutter. He bolted that on up and that girt was level too. The top center girt was bolted in and it all looked good.
Last but not least was connecting the angle braces. The first was off by half a bolt hole which Daniel burned with the torch, the other fit fine. After picking up tools and such, Daniel got up on the lift and painted the bracket he had welded. He was painting in the dark, using his cell phone as a flashlight. They finally headed out at around 9:30pm. Now we can tighten everything up and start installing the front sheeting for the last time.
|
|
|
|
|
|
|
Copyright (C) 2004-2014, Larry Manka. all rights reserved.
|
|