| |
My New Wood Stove
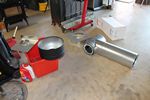
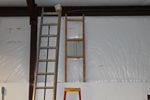
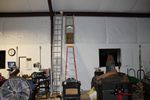
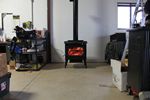
The building is all done and it's starting to get chilly outside. I needed a way to generate some heat in the building so I bought a wood stove and chimney from Home Depot. The stove was delivered to the store where I picked it up about 2 weeks ago on October 20th. The chimney parts were shipped from the manufacturer and didn't come until November 11th.
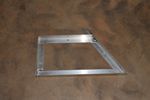
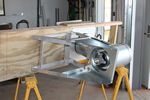
I knew that I would need to build a bracket to move the chimney bracket away from the outside wall by 10 inches in order to clear the gutters on the building. I couldn't really pre-make anything without the chimney parts. I built the extention bracket out of some aluminum angle that I had laying around. It gave me a chance to do some welding as well. Once all of the pieces were cut I went to work welding them together. I had to make sure the two sides were identical mirror images so that the chimney bracket would sit properly on the wall.
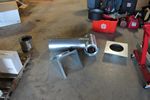
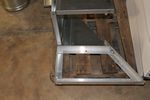
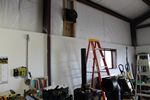
I needed a way to attach my new bracket to the building and since the walls are thin metal I made a small wooden wall section that I mounted between the top girt and the eave strut. I then boxed in the area where the chimney goes and proceeded as though I was mounting to a wooden wall. Because the T-bracket is only 12 inches wide I put a thick piece of plywood on my wall section so that I had something to bolt it to.
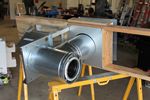
With the wall section on the shop floor I assembled the chimney T-fitting and brackets to my wall section. This way I had templates for drilling mounting holes for the T-bracket and cutting the big hole for the chimney. I drilled small holes around where the chimney would go and used those on the outside as a guide for cutting. Using an air grinding tool I cut through the center rib from the outside at the top and bottom of the chimney hole. I moved inside and tried to use a sawz-all to cut the hole using the inside plate as a guide. That worked until I had cut enough away that there wasn't any support and the wall just started moving in and out with the blade. I put a cut-off wheel on an electric grinder and finished cutting the hole from the outside.
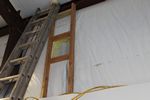
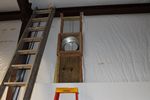
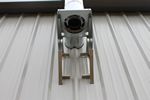
I carrired the assembled t-bracket and extension up and was going to bolt it to the wall when I realized that I had put cross braces on the darn thing and there was a wall rib in the way. I had thought about that when I was pondering my brackets a week ago and completely forgot about it when I was assembling everything of the shop floor. Since I had already drilled the holes in the metal wall I decided to remove the center of the two cross braces. I was working alone so had to come up with a way hold the bolts through the wall while I placed the bracket on the wall. I cut a piece of wood to jam in from the inside against the bolt heads. I slid the bracket over the bolts from the outside and started the ny-lock nuts onto the top bolts.
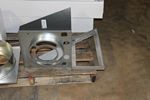
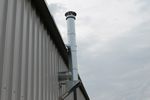
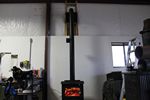
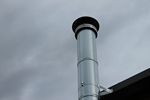
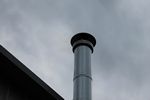
Back on the inside, I could reach through the chimney hole to reach the nuts on the outside and tighten everything down. Once the bracket was all snug on the wall I started assembling the chimney sections. With a 2 foot section of chimney pipe attached to the T-fitting, I fed the pipe through the wall and mounted the T-fitting to the bracket. There are 3 two foot sections above the T-fitting that got installed one at a time. The center section has a bracket that got attached to the gutter for support.
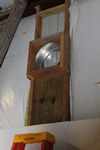
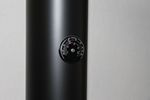
Now on the inside I started assembling the stove pipe from the stove to the chimney. After securing the through the wall section of chimney pipe I could measure stove pipes. I installed a full 4 foot section directly to the stove and then a barometric vent piece. I only needed a 3 foot section of pipe from the top of the vent to the elbow so I had to cut a 4 foot section down. A Home Depot visit was in order to purchase the crimping pliers needed to crimp the cut end of the stove pipe to fit into the vent section. The piece I cut off worked out to be the perfect length to connect the elbow to the outside chimney section.
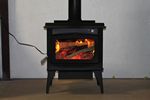
Once everything was straight and secured with screws I started my first fire. The stove keeps the garage at about 20 degrees warmer than the outside temps. If I toss one log on the fire before I close up at night there are still enough hot coals left in the morning to get the stove stoked back up and the building seems to hold enough heat that's it still cool but comfy in the morning.
|
|
|
|
|
|
|
|
|
|
|
|
|
Copyright (C) 2004-2014, Larry Manka. all rights reserved.
|
|